|
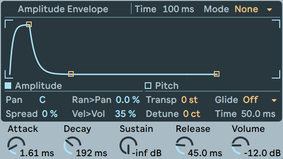
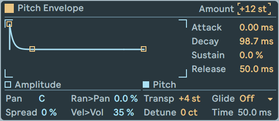
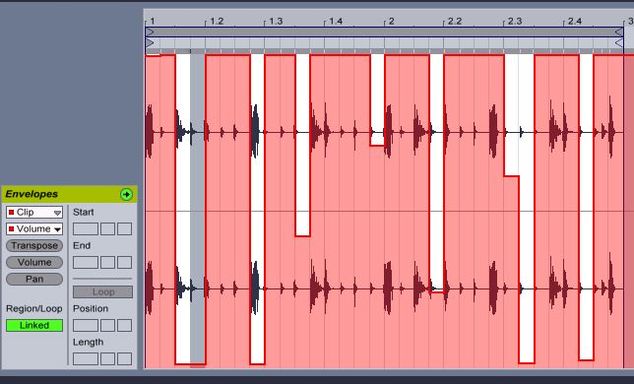
The audio sample world is a vast place with many treasures awaiting rediscovery. Samples have inspired some of the best music to date, and they continue to do so.  In music production sample selection is half the battle. Knowing what to do with it and how to make it work in production is just as important. We will be taking a look at how we can take a sample and change its purpose. Not every vocal sample has to be a voice and not every kick drum has to be a part of the rhythm section. This 3 part series will dive into multiple sampling techniques and demonstrate how versatile a single sample can actually be. Let's take a look at the many ways to FLIP a sample! ADSRMethod 1: Long Bass Textures to Plucks or Stabs A sustained note or chord can be easily turned into a stab or a pluck with basic amplitude envelope modulation.  Within Simpler’s “Classic” mode, bring the sustain level all the way down to –inf dB. Now begin to adjust the “Attack” time for punch and the “Decay” time for length of your newly created bass stab!  Tip: Try adding a fast pitch envelope (high to low) to create extra punch! Experimenting with the pitch can turn stabs into drum-like hits. Don’t forget to increase the “Amount” control for the pitch sweep to function. Method 2: Evolving Ambience or Vocals to Lead Instruments A sample with a lot of movement may sound indirect. Looping a small portion allows you to extract a select few unique waveforms to create stable sounds. Within Simpler’s “Classic” mode, zoom in and loop 1 to 5 cycles of a waveform. Play with the “Start”, “Loop,” “Length” and “Fade” parameters to optimize your sound. Note: “Warp” must be off to enable “Fade” function. Tip: Leave the “Sustain” at 0dB when creating holding notes. Method 3: Drums to Bass Instruments Using the low frequency information in a kick drum or snare can provide effective sustained bass sounds. Within Simpler’s “Classic” mode, load a kick, locate the section with predominantly low frequencies and engage the “Loop” function. Once again, fine tune this sound by playing with the “Start”, “Loop”, “Length” and “Fade” parameters. Tip: To tune an instrument, simply load “Tuner” after Simpler and trigger the note C. If “Tuner” detects a different note, calculate the difference between the note pressed and the pitch detected. Transpose the sample by this number of semitones to tune your instrument! If you need centitones to slightly detune your sample, this option is available via “Detune” directly below “Transp”. Method 4: Long Samples to Rhythmic Percussion When creating vocal or instrument chops, editing samples in “Arrangement View” can be a tedious process. Create predetermined slices via different modes and have the power of the entire sample at your fingertips. Within Simpler’s “Slice” mode, load a long vocal or instrumentation sample. Engage “Transient” (or experiment with other modes) under the “Slice By” menu. Now, create a MIDI clip and begin writing percussive patterns as you would with a drum kit. If your song lacks rhythmic movement, this can be a great way to achieve it! How to Flip a Sample in Ableton pt. 2/3 - Generating MIDI from Audio WEDNESDAY MARCH 25TH! In the last post we talked about taking away existing elements to make variations and sounds less repetitive. While that method proves to be effective in a busy or full-sounding track, it can not fill up a less busy or thinner track. So this post will dig into the melodic modifications that can help fill up those empty spaces or enrich the harmonics of thinner chord progressions (in many cases this would be the first step of making loop variations, followed by rhythmical changes, and finished with tonal adjustments). One of the easiest ways of achieving a richer/fuller sound is to add a 7th note to your basic triad chords, to form 7th chords. In the past, 7th chords were almost exclusive to genres like blues and jazz for their unique harmony and potential to create more complex chords through inversions (will be covered in pt.2 of this topic) and add-ons (9th, 13th, etc). In today's music scene, 7th chords, along with other complex chords are ubiquitous -- from R&B to HipHop, Folk music to EDM. Let's say you're working on a loop with 2 chords (e.g. A minor -> F major) as the main chord progression of the track (or it could be just for a specific part of the track). All you have to do is find the 7th note of the corresponding scales, A minor and F major scales in our example, which happen to be G and E, respectively, and add them on top of our triad chords, A minor (A-C-E) and F major (F-A-C). As a result, we end up with an A minor 7th chord (A-C-E-G), and a F major 7th chord (F-A-C-E). If you feel that it is still not full enough, try adding an additional 9th note of the scale (which also happens to be the 2nd note since the 8th note is the same as the root note, just an octave higher) and you will get even richer and fuller sounding chords than before. Note: Be careful when you play with big chords a lot, as it takes up more space frequency wise. One easy and creative way to avoid having too many notes with one instrument is to select some of the notes from the chords and let another instrument play those notes and delete them from the original instrument. It will give you the full depth of the harmony while creating interesting layers of textures. Also, while the extra harmony opens up the potential for the use of new melodic lines, it may collide with certain notes (or take away its effectiveness) that used to work in the old melody before modifying the chords. Stay tuned for part 2 of this topic, as it will cover how you can take these new chords and create close to infinite amount of variations. Covering all the essential components of music creation from the perspective of the musician, DJ and Producer, the Music Fundamentals class starts from the basics and assumes no previous musical training. With a hands on learning approach this is a lab style course designed to fill the gaps in any artists theoretical understanding of how electronic music is made. Using Ableton Live 9 and Midi keyboards we will show you how to have fun with melodies and harmonies by focusing on foundation skills and concepts that will give you the confidence to create meaningful changes and progression in your tracks. Our primary focus here is to teach the language of music without the tedium of traditional music theory by directly translating your ideas into sound. See More... There are many ways to make variations for repetitive sections in your tracks (introducing new instruments, adding more melodies, etc.,) but one of the most effective and underlooked method is to take away some of the existing notes or shifting the timing of percussive instruments very slightly. For example you can take away every other chord or bass notes instead of trying to add new ones, and you can also let the snare hit slightly early (or late) instead of adding more hits. You can do all this through volume automation or warping (in audio tracks), and taking out/shifting the midi note (in midi tracks). So next time you're in need of variations, think of what you can do with what you already have before trying to add new things, it will keep the track from sounding too busy and consequently you'll have more space for other things at the same time - if you need more that is. For more tips and tricks, check out our Music Fundamentals course!
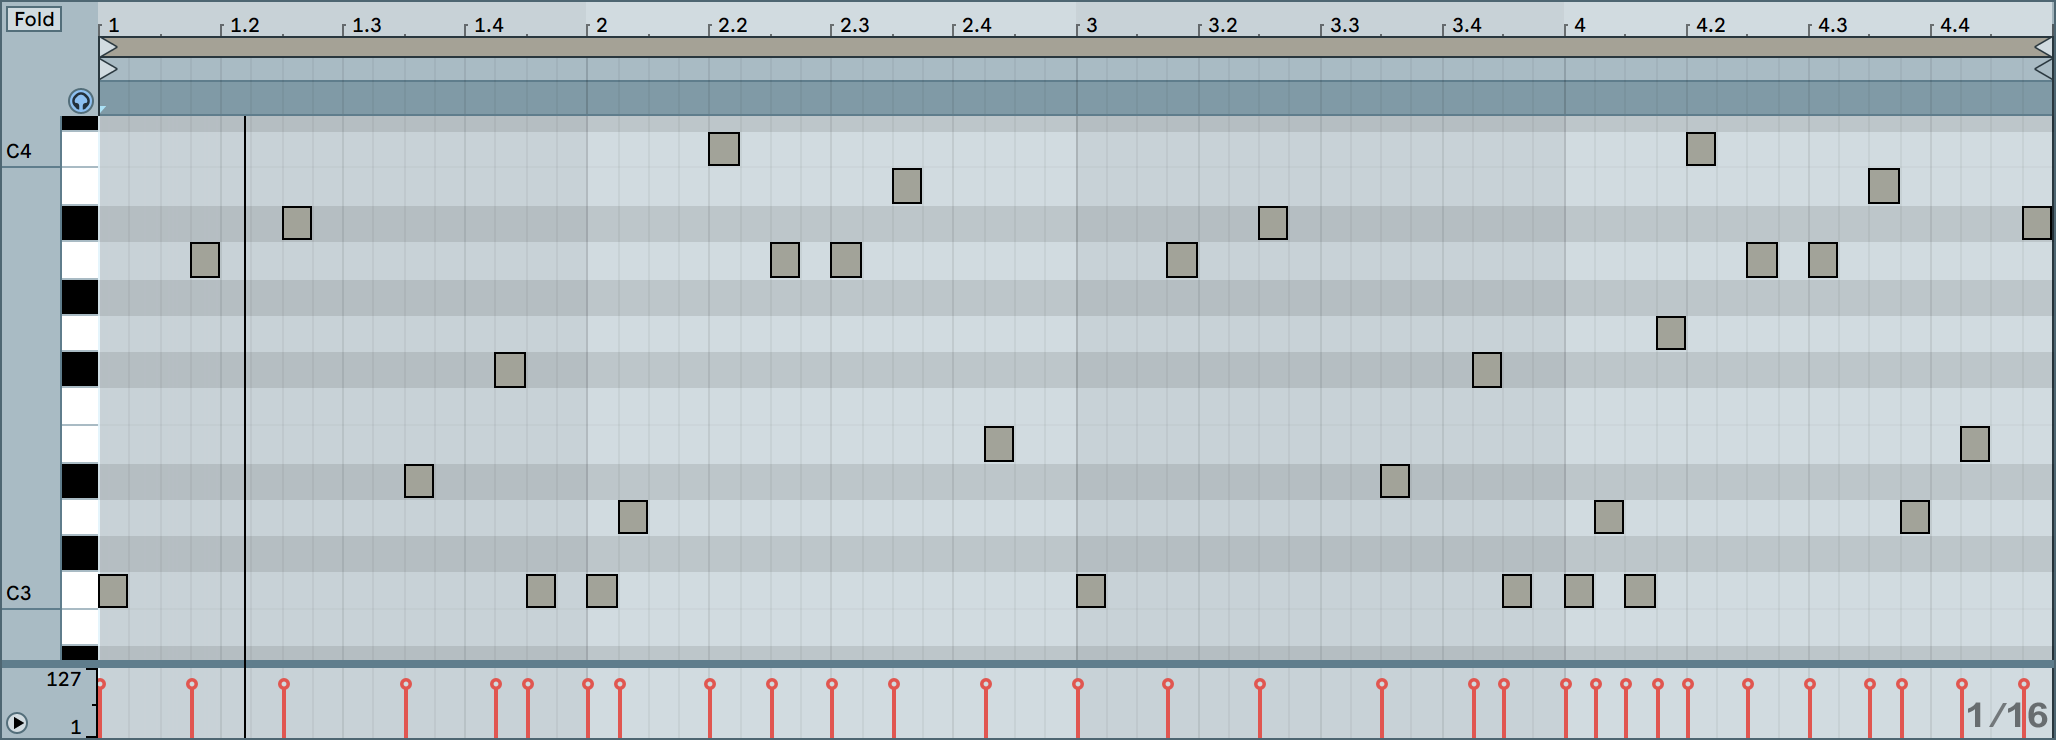
If you ever run out of ideas for melodies, you can always break down your chords into single notes (arpeggio)
and play around with the spacing for a simple in-key melody/harmony. For a little more variation and originality, you can add any notes from the appropriate major/minor scale (according to what type of chord you just broke down) between the original notes from the arpeggio. Refrain from adding too many notes though, more notes could mean less space to play around with creative rhythm. If you have no clue what any of this means, come check out our music fundamentals course! |


 RSS Feed
